
September 2020
How to Configure Custom Email Accounts
So you’ve gotten tired of your company Gmail or Outlook account, and have decided to upgrade to a brand new user@yourcompany email account. We hear you, it’s exciting! But what’s not so exciting is setting up your email for the first time.
But fear not, we’re here to guide you through the process. Below you’ll find guides for a few popular email platforms, and step by step instructions to set up your account. We hope these help you set up your email on your own, but feel free to contact us if you have any questions or concerns.

iOS Devices (iPhone & iPad)
Before setting up your account, make sure you know your account’s username, password, and server information. These will be sent to you when your email accounts have been configured. The steps below apply to and have been tested with iOS 13 and iOS 14.
Step 1
Open the Settings app and scroll down to Passwords & Accounts (if you do not see this option try going to Mail and then Accounts)
Step 2
Tap Add Account, then tap Other, and finally Add Mail Account.
Step 3
Enter the following information:
Name – This is the name you will send emails with (Usually your name or your company name)
Email – This is the email account you are setting up (example: user@yourcompany.com)
Password – The password for your account as provided
Description – This is how your account will be identified in the Mail app (Work, Company Name, etc.)
Press Next
Step 4
You will only see the next section if your device can not automatically locate its settings. If you see a Done button, go ahead and skip to step 6. Otherwise read below:
You will see two new sections, Incoming Mail Server and Outgoing Mail Server. Both sections must be filled in even if they are listed as optional. The settings for both sections are identical unless otherwise informed.
Incoming/Outgoing Mail Server
Host Name – This was provided alongside your username and password (Usually mail.yourwebsite.com or yourwebsite.com)
User Name – This is the same as your email account (example: user@yourcompany.com)
Password – This is the same as your email password.
Press Next
Step 5
Make sure Mail is turned on, and Notes is turned off. Then click Save.
Step 6
That’s it, you’re all done! Go ahead and send a test email. Make sure you can send and receive emails.
Windows Mail App
Before setting up your account, make sure you know your account’s username, password, and server information. These will be sent to you when your email accounts have been configured. The steps below apply to and have been tested with Windows 10.
Step 1
Open the Mail app on your PC. If you haven’t previously set up an account, you will be prompted with an add account screen.
Otherwise, click the settings icon near the bottom left of the screen. Then click Manage accounts on the settings pane on the right side of the screen, followed by Add account.
Step 2
Click Other account, POP, IMAP from the list of email providers.
Step 3
Three fields will appear, fill them in as explained below:
Email Address – This is the email account you are setting up (example: user@yourcompany.com)
Send your messages using this name – This is the name you will send emails with (Usually your name or your company name)
Password – The password for your account as provided
Click Sign in
Step 4
You may or may not be asked to fill in any of the following fields. Use the explanations below as a guide:
Email address – This is the email account you are setting up (example: user@yourcompany.com)
User name – This is the same as your email address (example: user@yourcompany.com)
Password – The password for your account as provided.
Account name – This is the name that you’ll see in the left pane of Mail for Windows 10, as well as in the Manage Accounts pane. You can choose any name you want.
Send your messages using this name This is the name you will send emails with (Usually your name or your company name)
Incoming email server – This was provided alongside your username and password (Usually mail.yourwebsite.com or yourwebsite.com)
Account type – Select IMAP
Outgoing (SMTP) email server This was provided alongside your username and password (Usually mail.yourwebsite.com or yourwebsite.com)
By default, all four checkboxes at the bottom of the window will be selected. Most email accounts don’t require any changes to these options.
Click Sign In
Step 5
That’s it, you’re all done! Go ahead and send a test email. Make sure you can send and receive emails.
macOS
Before setting up your account, make sure you know your account’s username, password, and server information. These will be sent to you when your email accounts have been configured.
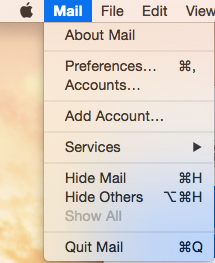
Step 1
Open the Mail app. If you aren’t prompted with an Add Account screen, click mail on the menu bar at the top of the screen, then click add account.
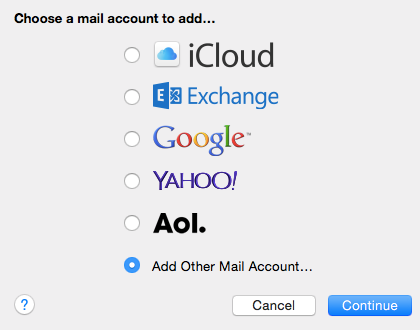
Step 2
Click other on the Add Account screen.
Step 3
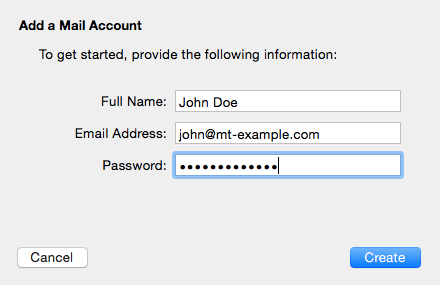
Enter the following information:
Full Name – This is the name you will send emails with (Usually your name or your company name)
Email Address – This is the email account you are setting up (example: user@yourcompany.com)
Password – The password for your account as provided
Press Create/Sign In
Step 4
You will only see the next section if your device can not automatically locate its settings. If you see a Done button, go ahead and skip to step 6. Otherwise read below:
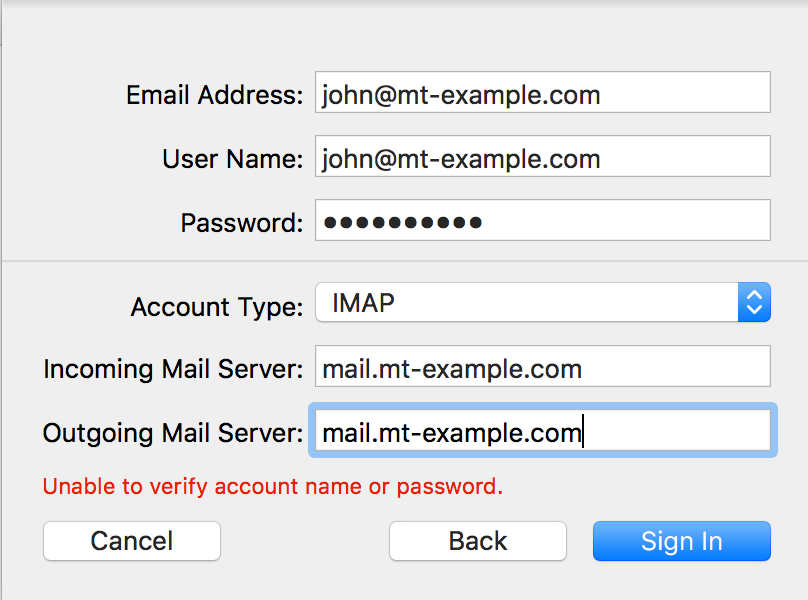
You will see a new section open. Fill in the information as explained below:
Email Address – This is the email account you are setting up (example: user@yourcompany.com)
User Name – This is the same as your email address (example: user@yourcompany.com)
Password – This is the same as your email password.
Account Type – Set this to IMAP
Incoming Mail Server – This was provided alongside your username and password (Usually mail.yourwebsite.com or yourwebsite.com)
Outgoing Mail Server – This was provided alongside your username and password (Usually mail.yourwebsite.com or yourwebsite.com)
Press Create/Sign In
Step 5
Make sure Mail is turned checked and everything else is unchecked. Then click Done.
Step 6
That’s it, you’re all done! Go ahead and send a test email. Make sure you can send and receive emails.